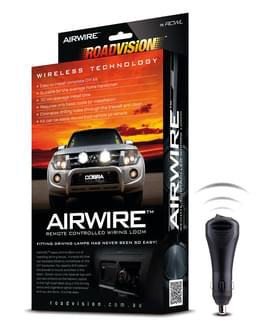
Roadvision Airwire Remote Control Wiring Loom Kit
by Roadvision
Save 17%
Original price
$119.90
Original price
$119.90
-
Original price
$119.90
Original price
$119.90
Current price
$99.00
$99.00
-
$99.00
Current price
$99.00
SKU RCWL
AIRWIRE™ takes all the effort out of installing driving lamps… A simple kit that can be easily fitted by workshops or the DIY handyman. No need to drill holes in the firewall or mount switches in the dash… Simply mount the receiver box and connect directly to the battery, splice in the high beam feed, plug in the driving lamps and cigarette lighter transmitter and you are done… It’s that easy.
AIRWIRE FEATURES
WIRELESS TECHNOLOGY – FITTING DRIVING LAMPS HAS NEVER BEEN SO EASY!
- Part Number: RCWL
- Easy to install complete DIY kit – 30 min
- Suitable for the average home handyman
- Requires only basic tools for installation
- No drilling holes through the firewall and dash
- Kit can be easily moved from vehicle to vehicle
- Multi-Volt 9-32V DC Input
- Fully potted electronics & waterproof
- 5m transmitter range & 3m plug & play harness
- 20A maximum output
- Deutsch & 3M gel filled connectors
FITTING INSTRUCTIONS
- Remove the main ground from the negative (B-) battery terminal.
WARNING: This may result in a loss of radio security code and clock settings. Consult your owner’s Manual before disconnecting. - Install driving lamps to vehicle on a suitable mounting surface away from exhaust system or turbo.
- Find a suitable place within the engine bay and mount the receiver box ensuring that the cables are long enough to reach the battery, driving lamps and high beam wire.
- Identify the driving lamp connection leads from the receiver module; these are fitted with 2 pin Deutsch connectors.
- Plug the driving lamp leads into your Roadvision driving lamps using either the 2 pin waterproof Deutsch connectors or female push on terminals. Take care to ensure the black lead is connected to battery negative input (B-) and red lead is connected to battery positive input (B+) to your driving lamps.
- Identify the blue high beam feed wire from the receiver module.
- Using a multimeter or test light find the active high beam switching wire located at the back of the head lamp.
- Cut wire in a suitable position and feed both ends along with the blue high beam feed wires into the supplied 3M Gel filled connector. Crimp connector with a suitable pair of pliers.
- Identify the main battery connection leads from the receiver module; these are fitted with 8mm ring terminals.
- Connect the 8mm battery positive (Red B+) and battery negative (Black B-) leads to the vehicles main battery terminals using the 8mm ring terminals.
- Re-connect the main battery negative (B-) terminal
- Secure all excess wire to the vehicle.
- Plug in the cigarette lighter transmitter module into your cigarette lighter plug inside the vehicle.
- Test the driving lamps by turning on the ignition, transmitter switch to ON and head lamp switch to high beam.
